"PIPING TANKED PROPANE INTO YOUR STUDIO" TUTORIAL by DeAnne Buchanan/The Glass Zone
(All material contained within this Tutorial is protected by Copyright, "The Glass Zone" DeAnne Buchanan, 2009; all rights reserved.)
BE SURE TO TEST ALL CONNECTIONS FOR LEAKS (using the "soapy water/bubbles" method) once assembled and installed. Tighten as needed.
SAFETY FIRST!!!
I've completed the final "Piping Tanked Propane Into Studio" Tutorial of sorts, along with photos of all component parts and part numbers (located just above bar codes on packages) from Home Depot which should be available Nationwide*. To assist your understanding, I've included some close ups and a few views of the final assembly. (*Some items cannot be found online, but are available in stores.)
This Tutorial is designed as a guide, and all safety precautions and individual local City, State and National requirements should be reviewed and followed. Please inquire at your local City Planning Department and/or local Fire Department to see if this Tutorial complies with the particularly Safety Requirements in your area before beginning.
NOTE: Please review the suggested layout as it pertains to your studio space, particularly as to the location of both the Propane Tank and the wall hole that the pipe will enter the studio, etc. Additional modifications in pipe lengths may be necessary. It may also work to your best circumstance to have a simple "L" design as opposed to the "Z". I suggest you draw out your basic studio layout, take general measurements to determine pipe lengths necessary (wall depth, for example, as well as the distance from the exterior pipe's location where it exits the wall to the propane tank), and think this through until you are comfortable with the basic concept before purchasing your parts.
FURTHER, I will be using hose clamps to tie in the T-Grade hosing on both ends of this assembly at the barbs one that leads to an inline flashback and onto the torch (interior); the other that leads to a flashback/quick disconnect/regulator and on to the Propane Tank (exterior). Here we go!
WHAT YOU'LL NEED:
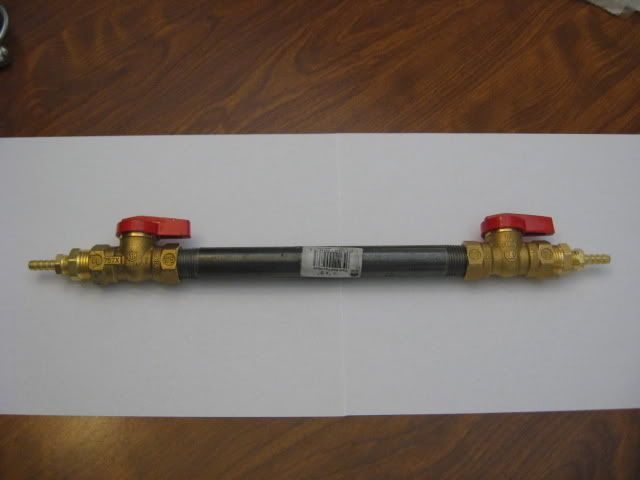
1. Gas Grade ½ Black Pipe (measure depth of wall and add 1" each side) threaded at both ends:

NOTE: I am not providing a part number for this item as it will vary depending on the depth of your studio wall. Suffice it to say that this is standard Gas Grade 1/2" BLACK Pipe, and you will want to allow approx. 2 more in the length than the actual depth of the wall. For example, if your wall depth (from inside finished wall to outside finished wall) is 6, this pipe should be purchased in an 8 length.
In addition, if you are making the L or Z designs, additional pipe in appropriate lengths will need to be purchased and added using the Elbow listed in #5 below.
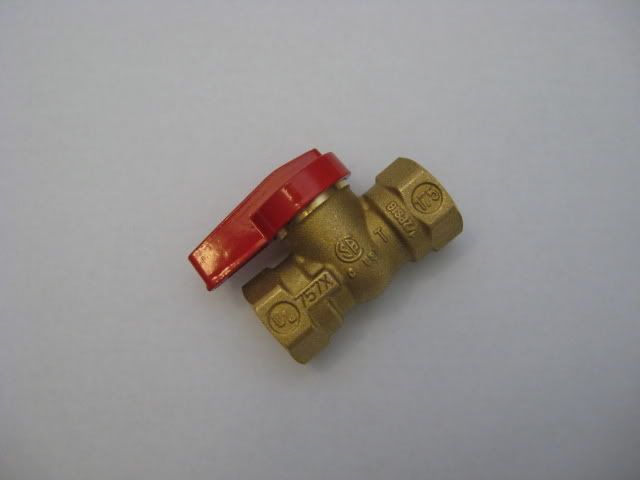
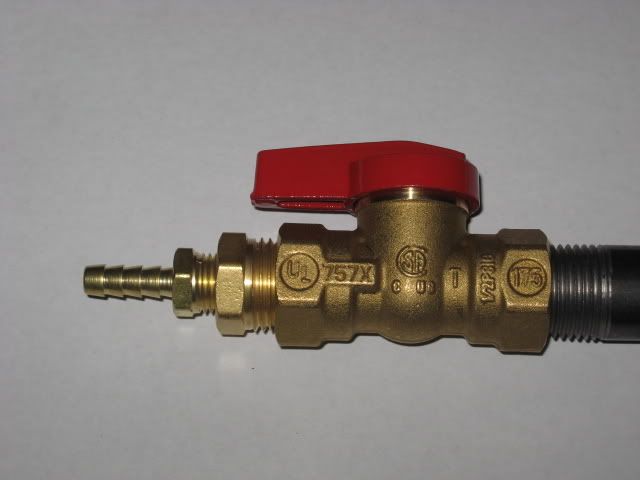
2. (Brass/Red Handle) Gas Grade Ball Type Shut Off Valve, ½ female fittings on both ends (Part # 110-523HC):
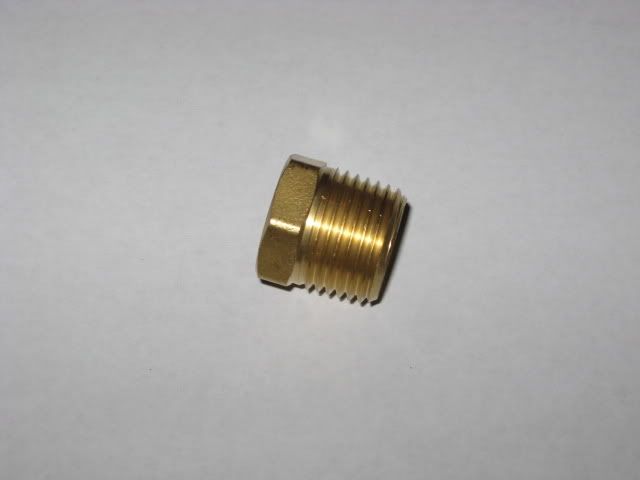
3. (Brass) Male Pipe to FIP Hex Bushing ½ x ¼ (reducer from 1/2" to 1/4") (Part # 17000827):
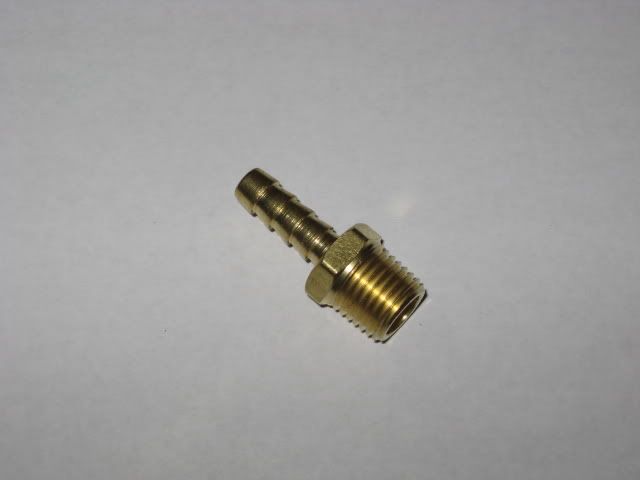
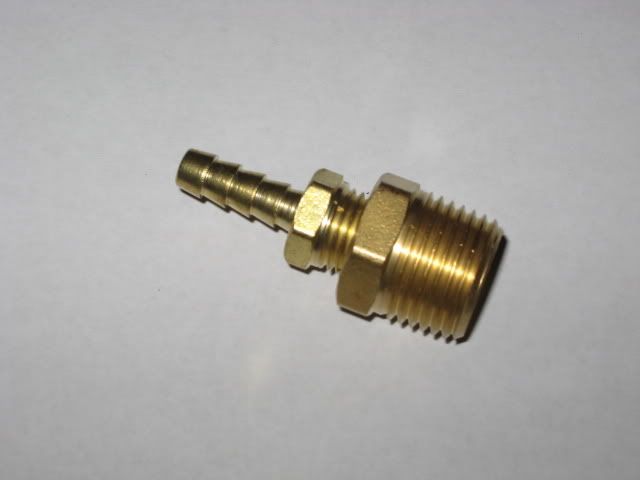
4. (Brass) Hose Barb Adapter ¼ Barb x ¼ MIP (Part # 17000192):
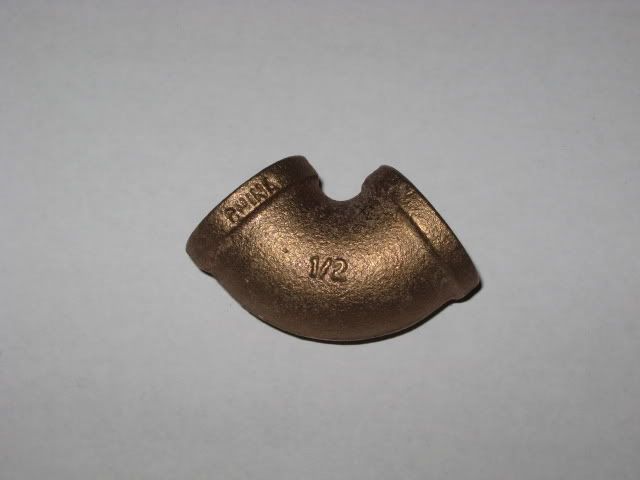
5. (Brass) Cast FIP to FIP Elbow ½ (Part #17000805)
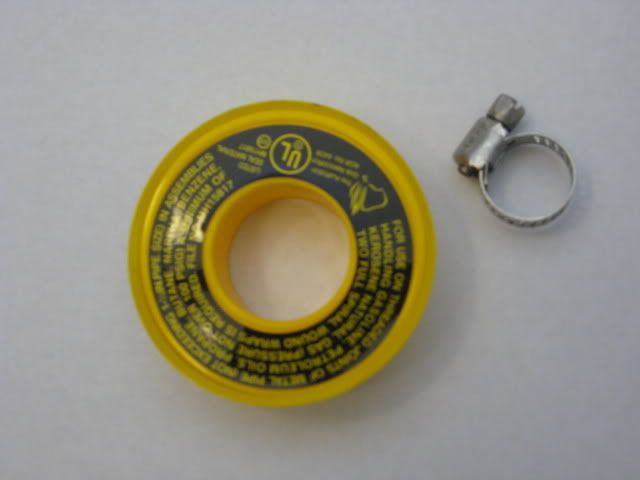
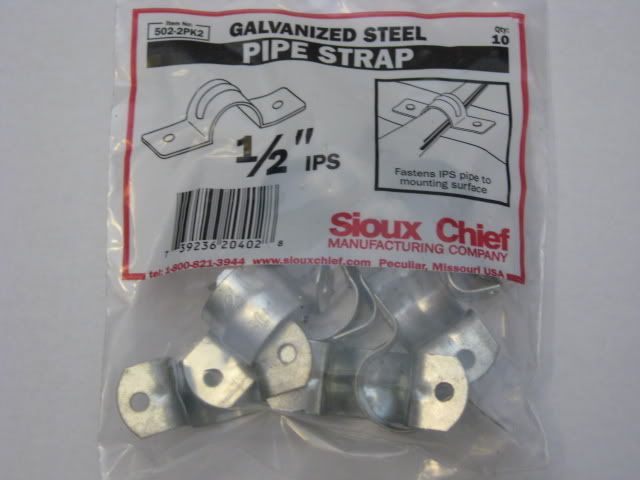
6. Misc. supplies - Gas Grade "tape" for connections, several ½ hose clamps, Galvanized Steel ½ IPS 2-hole pipe strap (Sold in packs of 10):
OK - Let's do a run-through of how this all works.
REMEMBER to use the proper Gas Grade Tape to insure a nice, tight fit on all connections when you do the final assembly. BE SURE TO TEST ALL CONNECTIONS FOR LEAKS (using the "soapy water/bubbles" method) once assembled and installed. Tighten as needed.
SAFETY FIRST!!!
First, Parts 4 and 3 above - fit together:
Add Part 2 Shut Off, and attach to Black Pipe:
(Same assembly on the other end of pipe)
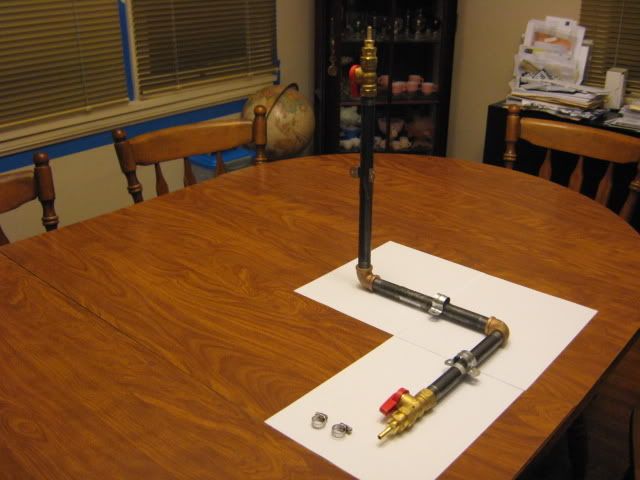
If making the "L" or "Z", add the elbows and additional pipes as needed. At the "end of the line" so to speak, add the second (exterior) Shut off with necessary couplings and barb end to attach your hose to.
A view of the Z modification to further anchor the pipe to prevent rotation (See Dale's helpful Diagram in Post #60 of this thread:
http://www.lampworketc.com/forums/sh...t=96149&page=2). As shown here - for picture purposes only - this assembly is turned sideways. In reality, the short pipe portion with the barb seen on the left would run through the wall into your studio and the longer portion seen standing up would actually be running horizontally against the wall toward your Propane Tank:
Hope this helps some of you out!
~DeAnne in CA
MARCH 2010 ADDENDUM:
I RECENTLY HAD SOMEONE PM FOR ASSISTANCE ON THE CONNECTION OF THE QUICK DISCONNECT/FLASHBACK AT THE PROPANE TANK, SO I'M POSTING MY RESPONSE WHICH CAN BE FOUND BELOW AT POST #24 ALONG WITH PHOTOS TO HELP CLARIFY THAT PORTION OF SETTING UP. ~De