Silk and Chain Steampunk Necklace
 Materials
:
Centerpiece - I used one of the steampunk watches that we bulk ordered from China, but you could use a lampwork pendant/bead!
1/4" silk cording
Cord Caps
Wire - I used 22g since that's what I had hanging around
Chain (I have three varieties here). My longest piece was TWICE as long as the cord and just happened to come attached to that watch.
Big jump rings (I think these guys are 10mm)
Clasp
Disk Beads
Lampwork Spacer Beads
Size 8/0 or size 6/0 seed beads
Beading Thread (I recommend Fireline)
Clear Tape
Glue - I recommend .527 watch glue or "Zap-a-Gap." Don't use superglue since it puts a white film on glass beads that looks bad.
Optional - Steampunk Cog Bead things (I used two - they were made by Tim Holtz)
Optional - if you're using a lampwork centerpiece: headpin and matching beadies
Optional - matching 6mm Swarovski crystal
Wireworking Tools - flat nosed pliers, round nosed pliers and wire cutters
The Centerpiece
If you have purchased one of the watches and want to use it as the centerpiece, you don't have to do anything to it besides take it off the chain. However, if you want to use a focal bead, you'll need to turn it into a drop first.
Slip a bead (shown is a Swarovski, but you’ll be using your focal) onto a head pin, and using round nosed or needle nosed pliers to bend the head pin over. If your lampwork bead hole is too big for the little "head" on that head pin, block it up with some smaller beads, one above and one below your bead. See the little space between the headpin and the 90-degree bend? You want this, but you only want a little bit of room there (no more than 1/16”).
Tip: In the photo I'm uploading, that's a towel behind the Swarovski, but it looks like a shag rug, so turn on some disco now to complete the rest of this project.

Next, hold the bent part of the head pin with round nosed pliers, and with your fingers bend the rest of the head pin around the nose of the pliers to form a loop.

Insert the nose of your round pliers back through the loop. Hold the loop of the head pin over the nose of the pliers while using bent/flat/needle nosed pliers to wrap the head pin around itself. This will secure your loop so it cannot open.
If you are using the watch, you might want to add some heavier beads at the bottom of the tassle chains. I've noticed the weight isn't well distributed otherwise. I also added some more chain into the tassle, because I LOVE fringe.
 The Silk Cord
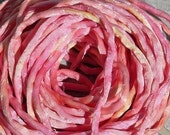
Our own Jamn makes silk cording, but its not as thick as the stuff I used. You could bundle some of hers together though, and it would add a layer of texture that would be really beautiful.
http://Jamnglass.etsy.com
Here's a photo I randomly ripped off her etsy site, just to tempt you. Hopefully she won't mind...
I found some of the thicker stuff also on Etsy at
http://TandZSupplies.etsy.com
but here's the thing... I've never ordered from this company and so as a result can't vouch personally for her.
She's got good feedback, though.
I happened to have a piece from a million years ago, made from a company called embeads. I looked them up online and can't find their website, though. I'd also like to pretend that I was all trendy in using orange since its the Pantone Color of 2012. Actually, the Pantone Color is "tangerine" and I just had this cord...
 The Disks
I refuse to take responsibility for my boro disk-making obession, so I'll just go ahead and blame someone else for it (you know who you are, up there in Canada)! You can make your disks out of either soft glass or boro. I just like the colors of the boro. If you want some, I've got plenty to spare, just let me know how many and the approximate color. They're super cheap, too. I used... uh... 8 of them. They only sort-of matched.
Anyhow, here's a bunch of eye candy I had hanging around on my computer...


If you do want to try and make your own, here are two videos I dug up on youtube. They use soft glass, but you could use boro instead. As a matter of fact, I think its easier in boro. You do want to pop them into a kiln, though.
http://www.youtube.com/watch?v=Xl5s3FLmdaM
http://www.youtube.com/watch?v=VtmR8Ib5z2s
Ready to put this thing all together?
Wrap your longest chain around the silk cording. Wrap it pretty tightly, and try to keep the wraps even.

Wrap scotch tape tightly around the ends. This will help to keep your chain nice and even with the silk cording and will also help keep the silk cording from fraying. Cut the tape directly in half so that when you add your bead cap the tape doesn't stick out from underneath that cap. Nip off the extra chain with wire cutters.
Wrap a piece of your wire around the chain and taped edge. Do it really really REALLY tightly. Add a bunch of glue right at the top of the tape. This will help keep your silk from fraying also, and acts as extra insurance in case your wire wrap wasn't tight enough. Run the wire up through the bead/cord cap. I like adding a matching bead up here to make the back look as nice as the front. Wirewrap your clasp onto the piece.
 Okay! Time to embellish the front!
Add a large jumpring at the center front. I like to catch the chain here, too, just to make sure that the wrap stays consistent. Attach your focal bead/watch to the jump ring.
I put a piece of thin chain through each of 4 disks and suspended them from jump rings around the cord/chain.

I also added two other short pieces of chain between the jump rings. You know, since I had that extra chain and all. The three chains I used in this piece did NOT match. This was part of the fun of it.

Finally, I stacked glass disks, spacer beads, cogs, Swarovski crystal and some 8/0 seed beads and sewed them onto the silk cording. My cogs were two different metals and none of the beads matched. I was okay with this!
Here's a close-up on one of those stacks.

Too busy for you? Here's a simpler version...

Now, lets see your version!