

|

2006-10-01, 5:01pm
|
|
Bobby
|
|
Join Date: Jul 01, 2005
Location: the US of A
Posts: 131
|
|
My pics ended up in the gallery section under leaves.........what a day ! ! !
Bobby
|
2006-10-02, 5:31am
|
 |
Member
|
|
Join Date: Mar 19, 2006
Location: Central Florida
Posts: 47
|
|
Thanks for the Tut, Bobby! I LOVE your leaves...they are soooooooooo pretty! I'm going to have to give this a try. Thanks for sharing!
Blessings,
__________________
Barb
To view links or images in signatures your post count must be 5 or greater. You currently have 0 posts.
To view links or images in signatures your post count must be 5 or greater. You currently have 0 posts.
To view links or images in signatures your post count must be 5 or greater. You currently have 0 posts.
|
2006-10-02, 9:04pm
|
 |
The Andrea Half
|
|
Join Date: Aug 18, 2006
Location: Georgia
Posts: 1,411
|
|
I tried some leaves; I put a photo in the Hot Head gallery, but here they are again. Thanks for the tutorial--it was a LOT of fun!

__________________
To view links or images in signatures your post count must be 5 or greater. You currently have 0 posts.
*
To view links or images in signatures your post count must be 5 or greater. You currently have 0 posts.
*
|
2006-10-02, 10:21pm
|
|
Bobby
|
|
Join Date: Jul 01, 2005
Location: the US of A
Posts: 131
|
|
WOW ! ! ! Those are cool.
Thanks for showing them.
It's great to see other leaves.
Aren't they just fun.
Bobby
|
2006-10-03, 7:15am
|
|
Just Me
|
|
Join Date: Jun 23, 2005
Posts: 169
|
|
Thank You Bobby!~ I have been so dissatisfied with all my leaves. These are just wonderful and I can't wait to try them. It really has me thinking of all sorts of other avenues to use the technique. Thanks so much for posting this.
~Barb
|
2006-10-03, 8:25am
|
|
The Andrea Half
|
|
Join Date: Aug 18, 2006
Location: Georgia
Posts: 1,411
|
|
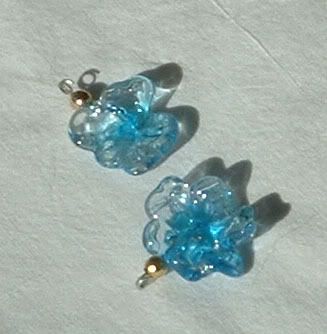
Thank you!!! Yes, I tried snowflakes, but they came out more like ice flowers:
__________________
To view links or images in signatures your post count must be 5 or greater. You currently have 0 posts.
*
To view links or images in signatures your post count must be 5 or greater. You currently have 0 posts.
*
|
2006-10-03, 11:24am
|
|
Junior Member
|
|
Join Date: Mar 09, 2006
Posts: 3
|
|
Quote:
|
Originally Posted by Gail Kops
Hi Bobby...wonderful tutorial - am definitely going to try it sometime. One question - in picture #1 where the wire is shown on the mandrel, what kind of wire is holding it on, or is all of the wire sterling silver?
As I understand it, the wire stays in place and becomes an embedded headpin?
Thanks! Looks great!
|
Hi Gail,
hope to see you soon, will send you an invitation,hugs,
AL
|
2006-10-03, 4:43pm
|
|
Senior Member
|
|
Join Date: Oct 10, 2005
Posts: 302
|
|
Oh, Gail..thanks for asking that! I wondered the same thing...does the wire then become the headpin? I thought I read that the wire is re-used, so I'm not sure.
Help!
__________________
Kathy
Laurel Lane Studios
To view links or images in signatures your post count must be 5 or greater. You currently have 0 posts.
To view links or images in signatures your post count must be 5 or greater. You currently have 0 posts.
|
2006-10-03, 5:08pm
|
|
Bobby
|
|
Join Date: Jul 01, 2005
Location: the US of A
Posts: 131
|
|
The sterling silver wire is the one you put the glass on and the other wire is the one that keeps the sterling silver wire on the mandrell. The sterling silver wire gets to hot to hold and is easier to push into the glass with the stiffness of the mandrell. I just reuse the mandrell and the scrap wire after I get the leaves out of the kiln. I used to just hold the sterling silver wire with tweezers but it wasn't safe. With the silver wire wrapped onto the mandrell you also have a handle to place in the kiln without getting your fingers hot.
Take care
Bobby
|
2006-10-03, 5:22pm
|
|
Bobby
|
|
Join Date: Jul 01, 2005
Location: the US of A
Posts: 131
|
|
 leaves
This was posted in the Gallery section by mistake so I'm reposting here:
Somehow our pop upblocker has something to do with the Ctrl button. I don't even want to know how it works.............just let me get what I need out of the computer and I'm o.k..................well sometimes ! ! !
This is too funny...........Norman fixed a problem for me in the uploading of a pic in the tutorial section and then said the computer was all mine. Well I thought I was adding to my tutorial and finished everything and went to see how it loaded...........guess what ? ? ? He had gone to the Gallery section..............You just can't get good help these days was his answer to my request of where in the world is my post ! ! ! So could someone tell me how to get this post sent back to the tutorials.
So.........here are the pictures that were supposed to be here a few days ago ! ! !


|
2006-10-04, 8:18am
|
|
The Andrea Half
|
|
Join Date: Aug 18, 2006
Location: Georgia
Posts: 1,411
|
|
Bobby, one thing I am finding is a problem is that as the leaves cool, they sometimes sheer off right below the wire, in a diagonal line. I don't have a kiln yet, so I am having to put the leaves in a fiber blanket to cool. Is that the trouble or am I getting too much glass at the end of the leaf?
__________________
To view links or images in signatures your post count must be 5 or greater. You currently have 0 posts.
*
To view links or images in signatures your post count must be 5 or greater. You currently have 0 posts.
*
|
2006-10-04, 11:39am
|
|
Bobby
|
|
Join Date: Jul 01, 2005
Location: the US of A
Posts: 131
|
|
leaves
I'm thinking that it is the fiber blanket. They are cooling to fast since they break off at the wire. It's like a bead that breaks off along the mandrel. The mandrel is taking out all the heat. Not sure how to keep them hot enough without a kiln.

My largest leaf is 45x30mm so the amount of glass size is not a problem.
|
2008-05-04, 5:53pm
|
 |
Hooked on Glass
|
|
Join Date: Jan 31, 2006
Location: Jacksonville Florida
Posts: 197
|
|
Thank you for all of the work that you put into this, it is great.
__________________
To view links or images in signatures your post count must be 5 or greater. You currently have 0 posts.
|
2008-05-05, 8:19am
|
 |
Floral Obsessed
|
|
Join Date: Oct 17, 2005
Location: Winnipeg, Canada
Posts: 1,375
|
|
I glanced at this tut briefly when it first went up, but I just *got* it now - sterling silver wire!!! That is so cool.
__________________
To view links or images in signatures your post count must be 5 or greater. You currently have 0 posts.
To view links or images in signatures your post count must be 5 or greater. You currently have 0 posts.
To view links or images in signatures your post count must be 5 or greater. You currently have 0 posts.
To view links or images in signatures your post count must be 5 or greater. You currently have 0 posts.
Nov. 2003-Nov 2005 --> QuietTorch, 1lb MAPP ::
To view links or images in signatures your post count must be 5 or greater. You currently have 0 posts.
:: Nov. 2005-May 2007 --> Piranha, NG, 1 Solaris oxycon ::
To view links or images in signatures your post count must be 5 or greater. You currently have 0 posts.
:: May 2007-Present --> Piranha, NG, 2 Solaris oxycons
|
2008-05-05, 9:01am
|
 |
Happy Beadmaker!
|
|
Join Date: Sep 08, 2005
Location: Clearwater, FL
Posts: 2,345
|
|
Same way I do my off-mandrel stuff, EXCEPT...
Great tutorial BTW!
This is the same way I do my off-mandrel stuff, except I form the gather on the end of the rod, press with leaf press or whatever, and pull slightly to start to separate from the rod. Take warmed tweezers, grab end of leaf farthest from rod and fire-cut the leaf from the rod. Then let the end of the leaf you've just separated ball up and insert slightly pre-heated wire into that tiny balled-up place in the leaf "vein" and VOILE, pop it in the kiln "as is" no mandrel needed. I use copper wire to do this all the time.
Infinite possibilities!
Lea
|
2008-05-05, 10:05pm
|
|
Bobby
|
|
Join Date: Jul 01, 2005
Location: the US of A
Posts: 131
|
|
Lea...........that is just too cool.
I will be giving this a try and save some time
on wiring up the mandrels.
Thanks
Bobby
|
2008-05-06, 1:47am
|
|
Happy Beadmaker!
|
|
Join Date: Sep 08, 2005
Location: Clearwater, FL
Posts: 2,345
|
|
You're very welcome...
...you'll save lots of time and aggravation that way!
Have fun,
Lea
|
2008-06-10, 10:20pm
|
 |
Senior Member
|
|
Join Date: May 29, 2006
Location: NC
Posts: 1,202
|
|
Hi Bobby, Just wanted to tell you I tried your very cool tutorial tonight for the first time.
I was lazy so just tried sticking copper wire into the end of the burned off rod.
The first one, a huge um....shape, can't call it a leaf really, went well.
The second, a small cube wouldn't grab the copper. I finally put it on a mandrel and said "Now what???" Then I remembered, you did it with a mandrel to begin with, (duh!) so pulled it back off the mandrel with pliers, and managed to reinsert the copper wire.
By that time the cube has lost most of it's shape. Pretty hard to marver a cube attached to a piece of 20 gauge copper wire LOL!
But this was fun and has me thinking of what other fun shapes I could make. I may try using high temp wire since it's stiffer until I get it down pat. Then I'll use nice Sterling Silver wire.
Thanks a bunch!
__________________
Angela
To view links or images in signatures your post count must be 5 or greater. You currently have 0 posts.
|
2008-06-10, 11:05pm
|
|
Bobby
|
|
Join Date: Jul 01, 2005
Location: the US of A
Posts: 131
|
|
Thanks Angela...............I love the process you are going through.....and.......you are having way too much fun ! ! !
I still love to put things on the end of a wire. I have a litle sig brass piece that I press into a circle of glass and use them on finished pieces.

Thanks again
Bobby
|
2008-06-11, 11:31pm
|
|
Senior Member
|
|
Join Date: May 29, 2006
Location: NC
Posts: 1,202
|
|
Re-hi, I was reminded while doing this of some peeps used shaped copper as presses. Just like your brass sig! Now I'm going to have to make one. Big GRIN!
Wait! I have some brass strips of copper that I bought at the Hobby store for practically pennies. Wonder if I could use that? Hm....Thanks for another idea! 
__________________
Angela
To view links or images in signatures your post count must be 5 or greater. You currently have 0 posts.
|
2008-06-25, 7:32pm
|
 |
where is that UPS man?
|
|
Join Date: Mar 01, 2007
Location: behind you.....
Posts: 1,485
|
|
Great tut, must try now....
__________________
HAS ANYONE SEEN MY CAT... HERE KITTY KITTY
To view links or images in signatures your post count must be 5 or greater. You currently have 0 posts.
To view links or images in signatures your post count must be 5 or greater. You currently have 0 posts.
Deb
SERIOUS GLASS HO
To view links or images in signatures your post count must be 5 or greater. You currently have 0 posts.
To view links or images in signatures your post count must be 5 or greater. You currently have 0 posts.
_______________________________
scorpion and m15,m10, tanked O2, 1 bitchin sound system
|
2008-06-27, 7:11pm
|
 |
Molten Glass Addict
|
|
Join Date: Sep 25, 2007
Location: Northwestern Wisconsin
Posts: 490
|
|
oiy, I got two leaves in the kiln, and the third, I could not get the wire to stay in it. It finally broke into about 10 pieces and is now decorating my work bench. lol.
I was going to try a glass loop, but I've never done that before either. Then the mosquitos starting dining on my scalp. So I think I'll go watch tv instead. Some day I'll have a studio and won't have to work in the garage!!
__________________
Just Jamie
To view links or images in signatures your post count must be 5 or greater. You currently have 0 posts.
< me in my younger days
To view links or images in signatures your post count must be 5 or greater. You currently have 0 posts.
< me now days
To view links or images in signatures your post count must be 5 or greater. You currently have 0 posts.
< me after a pomegranate rum slushie
To view links or images in signatures your post count must be 5 or greater. You currently have 0 posts.
To view links or images in signatures your post count must be 5 or greater. You currently have 0 posts.
To view links or images in signatures your post count must be 5 or greater. You currently have 0 posts.
|
2010-05-04, 4:52pm
|
 |
Senior Member
|
|
Join Date: Jun 10, 2005
Location: Manhattan,KS the land of Purple Pride
Posts: 7,718
|
|
That is the best ever. Thank you for showing this to us. Awesome and more.
__________________
To view links or images in signatures your post count must be 5 or greater. You currently have 0 posts.
Rose Leslie
_____________________________________
|
2010-05-04, 5:36pm
|
 |
one day at a time
|
|
Join Date: Jun 27, 2005
Location: We are MOVING!!!
Posts: 8,319
|
|
Beautiful! Thank you so much!
__________________
You live in a world of money. Money means choices. No money, no choices. Welcome to reality.
Melody (Marlee Matlin) from Switched at Birth
|
2010-05-04, 8:51pm
|
|
Senior Member
|
|
Join Date: Oct 26, 2005
Location: Pink, Oklahoma
Posts: 495
|
|
Thanks for the tutorial. I have made similar leaves and let them cool in fiber blanket and annealed them later but I usually have a high breakage rate in the fiber blanket. By putting the silver wire on the mandrel and putting it directly in the kiln I should have less breakage.
I love the tweezers you modified, I'll try that trick, too!
This forum is so great!
Thanks again!
Tina
__________________
To view links or images in signatures your post count must be 5 or greater. You currently have 0 posts.
To view links or images in signatures your post count must be 5 or greater. You currently have 0 posts.
|
2010-10-28, 9:35am
|
 |
Senior Member
|
|
Join Date: Jun 11, 2005
Location: Oak Park, Il.
Posts: 1,483
|
|
I am making leaves today and can't wait to try this
__________________
Cathie
Artist in Corporate America
To view links or images in signatures your post count must be 5 or greater. You currently have 0 posts.
R-118
|
2011-12-08, 6:54pm
|
 |
Senior Member
|
|
Join Date: Jul 22, 2005
Posts: 519
|
|
This is where I learned to make my headpins. Great tutorial! Thanks Bobby!
__________________
To view links or images in signatures your post count must be 5 or greater. You currently have 0 posts.
To view links or images in signatures your post count must be 5 or greater. You currently have 0 posts.
To view links or images in signatures your post count must be 5 or greater. You currently have 0 posts.
|
2011-12-08, 8:29pm
|
 |
Senior Member
|
|
Join Date: Aug 27, 2005
Location: Limestone, TN
Posts: 1,534
|
|
Oh, I wish it wasn't so late! I want to go to my studio and make leaf headpins. I'm on a leaf kick right now and these are just awesome!
__________________
Diane Woodall
To view links or images in signatures your post count must be 5 or greater. You currently have 0 posts.
|
2011-12-17, 3:24am
|
 |
Junior Member
|
|
Join Date: Dec 11, 2011
Location: New Zealand
Posts: 29
|
|
Awesome post! I had a play at it today, using copper wire instead of SS, as that was what I had at hand. Looking good - will have to wait till they come out of the kiln tomorrow. Thanks for sharing
|
2011-12-17, 3:32am
|
|
Junior Member
|
|
Join Date: Dec 11, 2011
Location: New Zealand
Posts: 29
|
|
Leaves
Quote:
Originally Posted by TinaJ

Thanks for the tutorial. I have made similar leaves and let them cool in fiber blanket and annealed them later but I usually have a high breakage rate in the fiber blanket. By putting the silver wire on the mandrel and putting it directly in the kiln I should have less breakage.
I love the tweezers you modified, I'll try that trick, too!
This forum is so great!
Thanks again!
Tina
|
I didn't have the patience to modify any tweezers, but instead used my jewellery making round nose pliers to mark my leaves - worked well!
|
|
Currently Active Users Viewing This Thread: 1 (0 members and 1 guests)
|
|
|
 Posting Rules
|
You may not post new threads
You may not post replies
You may not post attachments
You may not edit your posts
HTML code is Off
|
|
|
All times are GMT -7. The time now is 4:55am.
|


