

|

2007-09-30, 1:23pm
|
 |
Molten Glass Addict
|
|
Join Date: Sep 25, 2007
Location: Northwestern Wisconsin
Posts: 490
|
|
Wow, I'm going to go try this. You all did awesome. I bow down to all of you!!
__________________
Just Jamie
To view links or images in signatures your post count must be 5 or greater. You currently have 0 posts.
< me in my younger days
To view links or images in signatures your post count must be 5 or greater. You currently have 0 posts.
< me now days
To view links or images in signatures your post count must be 5 or greater. You currently have 0 posts.
< me after a pomegranate rum slushie
To view links or images in signatures your post count must be 5 or greater. You currently have 0 posts.
To view links or images in signatures your post count must be 5 or greater. You currently have 0 posts.
To view links or images in signatures your post count must be 5 or greater. You currently have 0 posts.
|
2007-10-27, 10:07am
|
|
Shop Monkey
|
|
Join Date: Oct 17, 2007
Location: North of Seattle
Posts: 1
|
|
Thank you so much for posting this tutorial! I've seen this style before and could not for my life figure out how it was done. I gave it a shot last night. I still need some practice...and to warm up my shop. It's so cold in there right now that if I don't keep it well warmed the glass cools too fast when it's out of the flame. Because of that I have to work it too fast.
|
2008-04-11, 7:09pm
|
 |
Uh-oh means it's too late
|
|
Join Date: May 23, 2007
Location: South Florida
Posts: 2,527
|
|
I know this thread is older but I found it and tried it tonight and I can't believe how it worked!!! I still need loads of practice but with a toddler and a puppy I hope I can get some in. Mary your the best tutorial composer out there and thank you for sharing such an amazing technique.!!!! I will post pics manana.
Michelle
www.sundoorbeads.com
|
2008-04-13, 7:24am
|
 |
Senior Member
|
|
Join Date: Aug 02, 2007
Location: Nahant Ma
Posts: 1,901
|
|
 what is a decorative clear
Hi Moth:
Great tutorial, I want to try one but am not sure what you meant when you said bring your decorative clear to the edge. What is the decorative clear.
Thanks
Bob Proulx
|
2008-04-19, 10:25pm
|
 |
Senior Member
|
|
Join Date: May 29, 2006
Location: NC
Posts: 1,202
|
|
Quote:
Originally Posted by bob

Hi Moth:
Great tutorial, I want to try one but am not sure what you meant when you said bring your decorative clear to the edge. What is the decorative clear.
Thanks
Bob Proulx
|
Hi Bob, Here is what I think she means.
Quote:
Mary wrote:
3- Continue rings of dots in a bullseye pattern, or even random still looks nice. Bring your decoration clear to the rim of your disk. Carefully melt these dots in flat. Do this very slowly. Remember, you do not want your disk to get soft yet. Only melt the dots.
|
Meaning, bring your rings of dots/decoration all the way out to the rim of the disk. Instead of meaning clear as in a type of glass, but as in "clear" (all the way) to the rim.
Hope that makes sense?
Mary,
I tried these and had LOTS of fun. Sadly 2 out of 3 I made cracked later on. One was thermal, though I popped it in the kiln right away. Not sure if I trapped air inside? That part I'm confused about.
And the other was a mad grab for a stringer to wrap around the thin end using the wrong COE. (I was so excited!) Drat!
Either way it was a blast. If I can heal the cracked one I'll TRY to take a picture worth posting.
I just love your tutorials. It's so much fun to experiment with new techniques I would never try without tutorials like yours.
Thank you!
__________________
Angela
To view links or images in signatures your post count must be 5 or greater. You currently have 0 posts.
|
2008-04-20, 4:34am
|
|
Senior Member
|
|
Join Date: Aug 02, 2007
Location: Nahant Ma
Posts: 1,901
|
|
thanks ziggy
Yes that clears it up,(no pun intended). Thanks for the help
Bob Proulx
|
2008-04-22, 3:52pm
|
|
Senior Member
|
|
Join Date: May 29, 2006
Location: NC
Posts: 1,202
|
|
Quote:
Originally Posted by bob
Yes that clears it up,(no pun intended). Thanks for the help
Bob Proulx
|
But it's such a GOOD pun! 
__________________
Angela
To view links or images in signatures your post count must be 5 or greater. You currently have 0 posts.
|
2008-04-22, 4:44pm
|
|
Senior Member
|
|
Join Date: May 29, 2006
Location: NC
Posts: 1,202
|
|
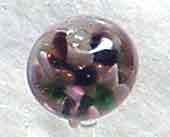
This picture is ugly, or maybe it's the bead (lol) but it shows the Implossion better and that's what this is all about so....

__________________
Angela
To view links or images in signatures your post count must be 5 or greater. You currently have 0 posts.
|
2008-04-22, 5:02pm
|
|
Senior Member
|
|
Join Date: May 29, 2006
Location: NC
Posts: 1,202
|
|
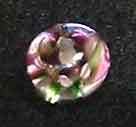
Ok, I'm getting picture happy...but here it is with the crack I mentioned.
I don't know why it cracked. I annealed it and a few days later it happened.
(I promise not to upload any more pictures, of this Implosion anyway.  )

__________________
Angela
To view links or images in signatures your post count must be 5 or greater. You currently have 0 posts.
|
2008-04-22, 5:10pm
|
|
Senior Member
|
|
Join Date: May 29, 2006
Location: NC
Posts: 1,202
|
|
Quote:
Originally Posted by Mincot
I wondered that, too. Here are three views of my first implosion bead, and the "flower" stops about halfway up. I was interrupted, though, and didn't melt the dots in totally flat before collapsing the bead. The bottom has a lovely grainy petal--the EDP devitted, and ifor once I am happy about that, because t looks good--each deep pink petal has a spread-out shadow of palest white etching.

I used transparent dark, dark violet for the center dots, then added goldstone stringer and EDP dots, interleaved with transparent sage green dots, and then another layer of EDP and goldstone stringer. |
I love your color choices! I wish your pictures were a little bigger to really see it!
__________________
Angela
To view links or images in signatures your post count must be 5 or greater. You currently have 0 posts.
|
2008-04-22, 5:12pm
|
|
Senior Member
|
|
Join Date: May 29, 2006
Location: NC
Posts: 1,202
|
|
Quote:
Originally Posted by raindance
Wow, Mary! I did it! You are such a great teacher! Because if your help I can do flowers...now I can do this! You're my hero! I need much more practice because, like you say, this is an exercise in heat control and patience...but so worth the effort!
P.S. Pardon the bead release in the picture. I was in such a hurry to get a picture and so excited when they came out of the kiln, I didn't clean these first. 
 |
Oh! These are so pretty. Now I've got to try hearts!
__________________
Angela
To view links or images in signatures your post count must be 5 or greater. You currently have 0 posts.
|
2008-04-23, 5:42pm
|
 |
Member
|
|
Join Date: Nov 12, 2007
Location: Minnesota
Posts: 95
|
|
I see this is an old thread but Wow! I am dying to try this! I have some time tomorrow so I will get to it first thing. If I can make this then I will think I've hit the big time! You are so nice to have shared this with all of us. My obsession with bead making continues!
__________________
To view links or images in signatures your post count must be 5 or greater. You currently have 0 posts.
Peggy
The Glass Chef
|
2008-06-20, 11:29am
|
|
Senior Member
|
|
Join Date: Dec 13, 2005
Location: Western Washington
Posts: 1,192
|
|
bless you! wonderful tutorial...easy to follow
__________________
Never lose your sense of awe.
Beads galore at my ebay store!
To view links or images in signatures your post count must be 5 or greater. You currently have 0 posts.
Minor with a REGALIA heavenly!
|
2008-06-21, 6:32am
|
|
Member
|
|
Join Date: Nov 12, 2007
Location: Minnesota
Posts: 95
|
|
Okay, here is what I made.
__________________
To view links or images in signatures your post count must be 5 or greater. You currently have 0 posts.
Peggy
The Glass Chef
|
2008-07-19, 9:36pm
|
|
Mary Lockwood
|
|
Join Date: Jun 21, 2005
Location: Boonies
Posts: 5,831
|
|
OH Peggy! I love 'em. Sorry it took me so long to see them. It had been so long since this thread was bumped up that I wasn't checking regularly. Great job and I love the shapes!
Angela, I'm sorry I missed you too! Thanks for clearing that up about the clear..you explained it perfectly.
Your bead is awesome, I'm so sorry it cracked. It is really hard to diagnose things like that from afar (heck it is hard to diagnose it up close sometimes), but if you aren't including anything in the beads that isn't normal (like silver or a different coe of glass), then the problem is more than likely thermal.
These beads go from a thin narrow profile that is cool much of the time while you decorate it, to a hot molten blob of flowing glass that wants desperately to be round. Then it goes through the shaping phase which can introduce a lot of uneven heating and spot cooling with tools. Then there is the post-production admiration phase where we stare at it for a while before we put it in the kiln. hehe.
Anyway, after you have the implosion done, be careful to keep an even, deep heat in the bead as you shape it. After you have it shaped, bring the bead up to a slow glow all over, pay close attention to the mandrel at the ends of the bead. If you heat the mandrel at those points, the heat travels up the steel into the core of the bead.
Here is a great heat control practice....make a narrow barrel bead on a mandrel...can be a simple, single color bead. Warm it up to where you think it is evenly heated. Turn off your lights or stick the bead into a dark spot under your bench and look carefully at it. You will see if you have it heated evenly or not. Usually your ends will look cooler than the rest.
Wherever the bead looks the coolest...it is the coolest. Remember from then on, that when you make a barrel bead, heat those areas last before garaging the bead in the kiln. It will help combat uneven cooling as the bead lowers temp down to the kiln temperature.
Another good one...make a fat barrel of white on the mandrel. Get it cool enough to where the white is opaque over the whole bead. Now, aim heat right at the mandrel near the bead hole (right up against the hole). The mandrel will start glowing, and the bead will start to go clear on you because the effetre/vetrofond white goes transparent when hot. This is just a demonstration of how you can sink heat into the middle of your bead, as well as heat the pesky ends by aiming heat onto the mandrel. It travels.
The mandrel will cool faster than the glass that is on it and sucks the heat out of the ends of your beads first. If you heat that mandrel area before you put it in the kiln, the bead has time to catch up to that heat loss with less stress.
Hope I explained that ok. It is after midnight, I'm tired but can't fall asleep because I drank too much coffee and I'm typing so fast I think I could be in some typing contest or something.
PM me if you need more help!
~~Mary
__________________
To view links or images in signatures your post count must be 5 or greater. You currently have 0 posts.
To view links or images in signatures your post count must be 5 or greater. You currently have 0 posts.
To view links or images in signatures your post count must be 5 or greater. You currently have 0 posts.
|
2008-07-19, 9:41pm
|
|
Mary Lockwood
|
|
Join Date: Jun 21, 2005
Location: Boonies
Posts: 5,831
|
|
Aidensmommy...I'm so glad you had fun working on these! Thanks for sharing!!
~~Mary
__________________
To view links or images in signatures your post count must be 5 or greater. You currently have 0 posts.
To view links or images in signatures your post count must be 5 or greater. You currently have 0 posts.
To view links or images in signatures your post count must be 5 or greater. You currently have 0 posts.
|
2008-07-19, 10:30pm
|
|
Senior Member
|
|
Join Date: May 29, 2006
Location: NC
Posts: 1,202
|
|
Quote:
Originally Posted by Moth
OH Peggy! I love 'em. Sorry it took me so long to see them. It had been so long since this thread was bumped up that I wasn't checking regularly. Great job and I love the shapes!
Angela, I'm sorry I missed you too! Thanks for clearing that up about the clear..you explained it perfectly.
Your bead is awesome, I'm so sorry it cracked. It is really hard to diagnose things like that from afar (heck it is hard to diagnose it up close sometimes), but if you aren't including anything in the beads that isn't normal (like silver or a different coe of glass), then the problem is more than likely thermal.
These beads go from a thin narrow profile that is cool much of the time while you decorate it, to a hot molten blob of flowing glass that wants desperately to be round. Then it goes through the shaping phase which can introduce a lot of uneven heating and spot cooling with tools. Then there is the post-production admiration phase where we stare at it for a while before we put it in the kiln. hehe.
|
"Post Production Admiration." I laughed out loud when I read that.
Quote:
Anyway, after you have the implosion done, be careful to keep an even, deep heat in the bead as you shape it. After you have it shaped, bring the bead up to a slow glow all over, pay close attention to the mandrel at the ends of the bead. If you heat the mandrel at those points, the heat travels up the steel into the core of the bead.
Here is a great heat control practice....make a narrow barrel bead on a mandrel...can be a simple, single color bead. Warm it up to where you think it is evenly heated. Turn off your lights or stick the bead into a dark spot under your bench and look carefully at it. You will see if you have it heated evenly or not. Usually your ends will look cooler than the rest.
Wherever the bead looks the coolest...it is the coolest. Remember from then on, that when you make a barrel bead, heat those areas last before garaging the bead in the kiln. It will help combat uneven cooling as the bead lowers temp down to the kiln temperature.
Another good one...make a fat barrel of white on the mandrel. Get it cool enough to where the white is opaque over the whole bead. Now, aim heat right at the mandrel near the bead hole (right up against the hole). The mandrel will start glowing, and the bead will start to go clear on you because the effetre/vetrofond white goes transparent when hot. This is just a demonstration of how you can sink heat into the middle of your bead, as well as heat the pesky ends by aiming heat onto the mandrel. It travels.
The mandrel will cool faster than the glass that is on it and sucks the heat out of the ends of your beads first. If you heat that mandrel area before you put it in the kiln, the bead has time to catch up to that heat loss with less stress.
PM me if you need more help!
~~Mary
|
Huh! I never thought about the fact that the ends would cool fastest and the mandrel sucks the heat out, or adds it in depending.
But I bet that is exactly what happened. I made 3 beads and they all cracked. 2 cracked near the bottom! I have had very few beads crack, so this worried me since I didn't know what was wrong.
I do make sure to heat them well before they go in the kiln, (not counting the pause to admire them) and even turn off the lights to make sure the bead is glowing, but I never looked carefully at the ends! I just looked at the general glow of the bead.
Quote:
|
Hope I explained that ok. It is after midnight, I'm tired but can't fall asleep because I drank too much coffee and I'm typing so fast I think I could be in some typing contest or something.
|
LOL! I think you won the typing contest.  But I can't talk 'cause I make the same mistake with chocolate covered espresso beans. You would think I would get that it's just like drinking coffee.
Thank you for explaining why this happens. I feel better about trying them again.
Angela
__________________
Angela
To view links or images in signatures your post count must be 5 or greater. You currently have 0 posts.
|
2008-07-20, 6:39am
|
 |
Catalina Glass
|
|
Join Date: Jan 15, 2006
Location: So Cal San Diego
Posts: 145
|
|

Thank you Mary for the clear advice about heating evenly and paying more attention to the mandrel ends.! I tried again and made these waterlily beads that didn't crack! When I had attempted this style before I had such cracking issues I gave up. I just listed these in my Etsy and WOW, they sold within a half hour---- so thanks again.
Sharon
__________________
[
To view links or images in signatures your post count must be 5 or greater. You currently have 0 posts.
]]
To view links or images in signatures your post count must be 5 or greater. You currently have 0 posts.
Sharon -using a minor, propane and oxycon
[
To view links or images in signatures your post count must be 5 or greater. You currently have 0 posts.
To view links or images in signatures your post count must be 5 or greater. You currently have 0 posts.
|
2008-07-21, 5:05am
|
|
Member
|
|
Join Date: Nov 12, 2007
Location: Minnesota
Posts: 95
|
|
Wow!
Congrats on the sales! Those are gorgeous!
Peggy
__________________
To view links or images in signatures your post count must be 5 or greater. You currently have 0 posts.
Peggy
The Glass Chef
|
2008-07-21, 6:31am
|
|
Mary Lockwood
|
|
Join Date: Jun 21, 2005
Location: Boonies
Posts: 5,831
|
|
Yep, that heat the mandrel dealio goes with any bead I put in the kiln. I always heat the mandrel at the ends of the bead holes very last thing before I pop 'em in the kiln.
Sharon, I can see why those sold so quickly, they look like water lillies! Great job.
~~Mary
__________________
To view links or images in signatures your post count must be 5 or greater. You currently have 0 posts.
To view links or images in signatures your post count must be 5 or greater. You currently have 0 posts.
To view links or images in signatures your post count must be 5 or greater. You currently have 0 posts.
|
2008-07-21, 5:52pm
|
|
Senior Member
|
|
Join Date: May 29, 2006
Location: NC
Posts: 1,202
|
|
Wow Ryman! Those are really pretty. I love the color combo too!
__________________
Angela
To view links or images in signatures your post count must be 5 or greater. You currently have 0 posts.
|
2008-08-02, 11:21am
|
 |
Junior Member
|
|
Join Date: Jul 13, 2008
Location: Phoenix, AZ
Posts: 601
|
|
Mary, Thank you for the Jellyfish tut. I can't wait to try it out. (beybey)
__________________
Candace
To view links or images in signatures your post count must be 5 or greater. You currently have 0 posts.
Minor
|
2008-10-27, 10:38pm
|
|
Member
|
|
Join Date: Sep 05, 2005
Posts: 55
|
|
it was very kind of you to share your knowledge with us
|
2009-08-25, 5:15am
|
|
Junior Member
|
|
Join Date: Aug 12, 2009
Posts: 3
|
|
Hello all!
Im new to flameworking and I found this tutorial and was super impressed with the bead it makes and how easy the tutorial was to follow.
I have made 5 different beads using this tutorial and with each one they are looking more like the photos that have been uploaded in your guys individual post(s).
Quick question - Im using MAPP gas, a hot head, and soft glass. My disc color is a transparent color and my dots I am applying are a multi-color twistie that I made.
During the end of step 4 an before step 5 in the tutorial my latest beads have a crack mark in them that is perpendicular to the mandrel. The crack appears in the middle of the glass and no glass breask off. Each bead has 2 cracks one on each side of the mandrel.
I noticed the crack in as it shined in the light of my studio while the bead was in the flame. Unfortunately the crack is visible in the finish product.
Any thoughts on how I got this to happen? Or how to I stop it from happening in the future?
Any and all help will be greatly appreciated.
Sharon12345

|
2009-08-25, 8:53am
|
 |
SSDD... go ahead, ask me!
|
|
Join Date: Dec 12, 2006
Location: Houston, TX
Posts: 2,287
|
|
Hi Sharon,
Those sound like thermal cracks which result from not keeping the whole bead hot enough. Since the outside cools quicker than the inside of the glass it can cause stress which results in the cracks.
__________________
BarbaraJ...my mind is what matters
|
2009-08-28, 5:50am
|
|
Junior Member
|
|
Join Date: Aug 12, 2009
Posts: 3
|
|
 Still No Luck
Seems like the more I practice the worse things are turning out...I had a bead split in half on me last night. It was kind of cool to see it sliced right down the center I was rushing before my Mapp gass ran out so I wasn't able to heat it as was previously suggested. The bead prior though my implosion didn't start until more then half then length of the bead had slanted.
Is there benefits in making the initial disc as thin as I can get it?
Any thoughts on how to get the first set of dots closer to the mandrel?
How do you control the starting point for when the dots are transformed into the implosion?
Sharon12345
|
2009-08-28, 8:30am
|
|
Mary Lockwood
|
|
Join Date: Jun 21, 2005
Location: Boonies
Posts: 5,831
|
|
Your cracks are thermal- you aren't keeping the bead hot enough through the whole process OR you are letting it cool to fast at the end.
The benefit to making the initial disk as thin as you can is that your first row of dots will be closer to the top of the bead the thinner the disk is (and the closer your dots are to the mandrel when you apply them also affects this) . Thick disk- your first row of imploded dots will be further from the top. Thin disk- they will be closer.
The more you tilt the mandrel as you implode, the faster the implosion will happen- but it is a bit harder to control.
Best advice- make 200 of them- by then you will know exactly what causes what and how to make it happen on purpose.
Good luck!
~~Mary
Thanks for the kind words!
__________________
To view links or images in signatures your post count must be 5 or greater. You currently have 0 posts.
To view links or images in signatures your post count must be 5 or greater. You currently have 0 posts.
To view links or images in signatures your post count must be 5 or greater. You currently have 0 posts.
|
2009-09-22, 8:51am
|
|
Junior Member
|
|
Join Date: Aug 28, 2008
Location: North Tonawanda, NY
Posts: 9
|
|
I have done the implosion bead with stripes. It cracked cuz I took it out of the kiln too soon. But, I had serious problems with the pointy end--I had to keep adding clear glass at that end and I ended up making it look like more of a vase. HOW do you get it to be ROUND instead of LONG??
|
2009-09-22, 4:19pm
|
 |
Mr. Bubble -- OBS Member
|
|
Join Date: Jun 21, 2007
Location: Tulsa, Ok.
Posts: 563
|
|
Thanks for the mandrel implosion tut Moth.
I have your jellyfish tut as well, and plan on using both techniques together in one bead pretty soon I hope. I have posted these two beads in the gallery section before but this is where I should have put them first.
|
2009-09-23, 5:35am
|
 |
Lover of all things color
|
|
Join Date: Nov 25, 2007
Location: Lawrenceville, GA
Posts: 1,791
|
|
You know, I tried this one two years ago when I was a beginner and made a mess of it. Maybe it's finally time to try it again. I think I can, I think I can...
__________________
To view links or images in signatures your post count must be 5 or greater. You currently have 0 posts.
To view links or images in signatures your post count must be 5 or greater. You currently have 0 posts.
GTT Lynx-M10 Oxy-con
To view links or images in signatures your post count must be 5 or greater. You currently have 0 posts.
|
|
Currently Active Users Viewing This Thread: 1 (0 members and 1 guests)
|
|
|
 Posting Rules
|
You may not post new threads
You may not post replies
You may not post attachments
You may not edit your posts
HTML code is Off
|
|
|
All times are GMT -7. The time now is 6:36am.
|


